O yes! It’s a new craft post, finally!
It has been a while since I sat down to craft something with the kids. Not an excuse, but baby and the demands of being a self-employed consumes most of my energy. I am barely dragging my sleep-deprived body day to day but I know somewhere in the back of my mind that I want do something with the kids someday soon though I haven’t been good at putting down a date. So when Nat woke up and demanded for a lomocam last saturday, I thought we could ride on the opportunity to get something done.
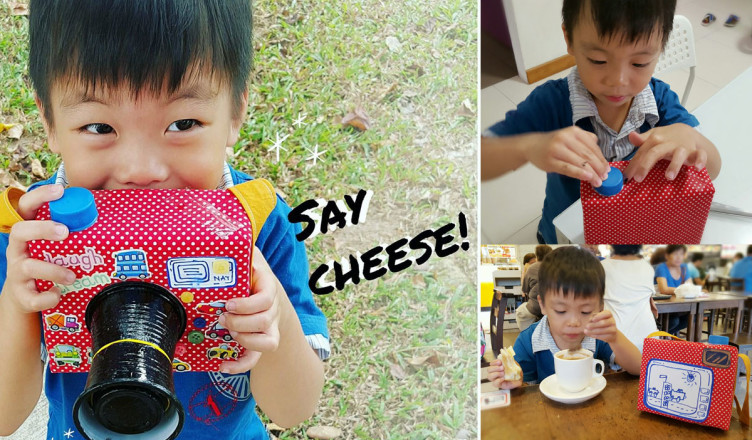
It was an impromptu craft session, using whatever we could find in our messy little home. The works – plastic cups, bottle cap, snack box and stickers aplenty.
Here’s how you can put together a quick craft camera with your little one too.
Step 1: Get an empty snack box and wrap it up with fancy paper or fabric.i

Step 2: Stick a bottle cap on the side top of the snack box – that would be the snap button of the camera.

Step 3: Get 2 plastic or paper cups and chop one of it into 2.

Paint the cups in a colour you fancy. They are the lenses of your camera.

Step 4: Using PVA craft glue, stick the cup onto the front of the snack box. You may want to stick layers of riboons to the front end of the lense. This will make it easier for you to adjust the “lenses” better.

Fix the other cup onto the front and there you go – an adjustable camera lense.

Step 5: Now imagine the photo you would like to take with your camera and draw it out.

Cut and paste it to the back of the camera and there you got a picture in the frame.

Tadah! Your very own craft camera is done!
Now go ahead and decorate with stickers of your choice.

Pretty cool, right? And, very easy to make too!
i loves this!!! am so gonna do this when i can find the time! haha