I love JULY!
Why so? Cos it’s my Renee’s birthday month! We just celebrated our second child’s birthday recently. We had 3 mini celebrations – at home, with extended family and in school, of which, her favourite was the mini party we had at home with her friends from the childcare she attended previously.
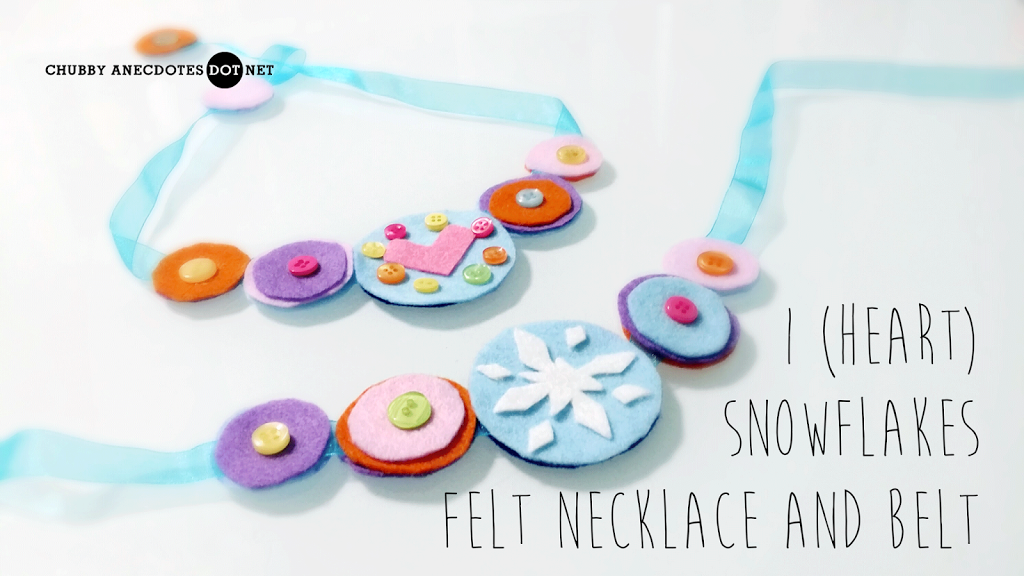
It was a simple party with a few of her closer friends. Nothing too elaborated, just good company, simple snacks, a DIY Frozen pinata, a DIY Frozen character cake, Frozen DVD playing on the background and a simple felt craft activity for the Frozen fans (okay, more than a handful, but still simple. We had simple stuffs). Yes, Renee’s a big Frozen fan.
I’ll share more about her 3 mini celebrations on the blog in time to come. Frankly, I haven’t got the time to sit down and download all the photos from my camera and phone. But I really should be doing so soon. I’m sure it would be long before Renee ask to see them. 🙂
For now, I’ll share about the little craft activity we invented for the party. It’s super easy to do.
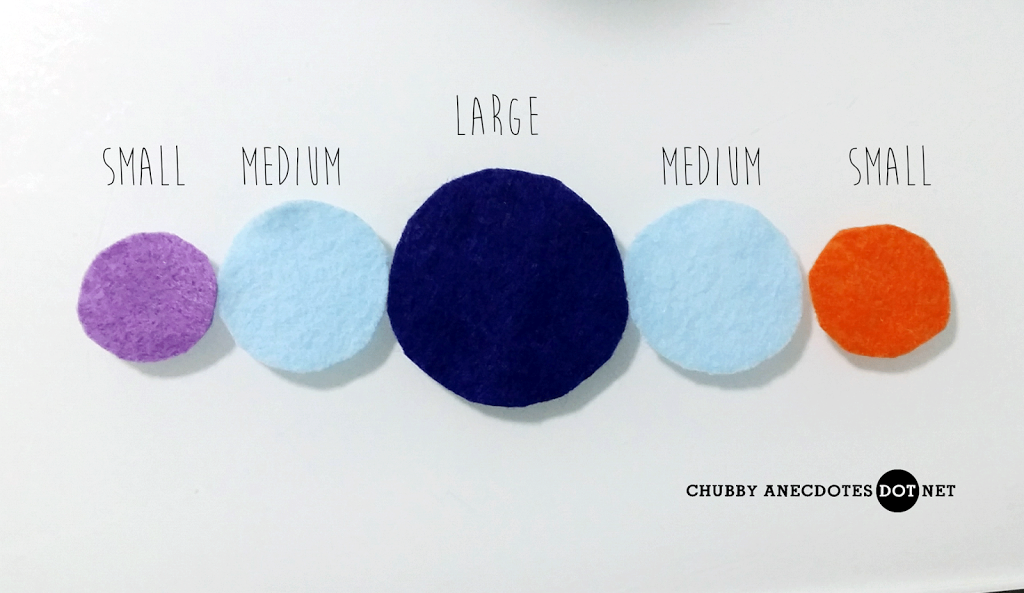
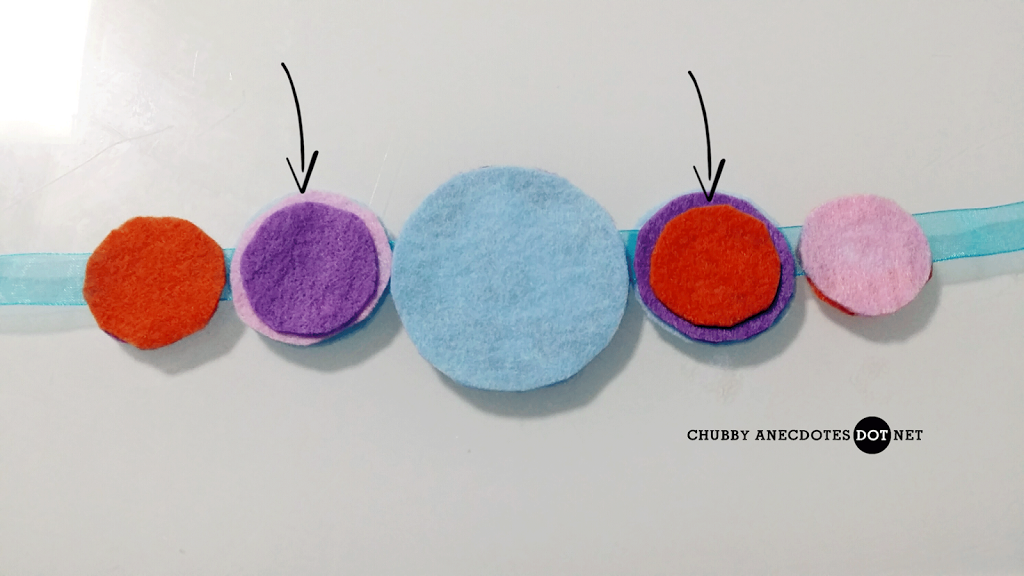
Step 1: Cut out felt circles into 3 sizes and place them in the following sequence.
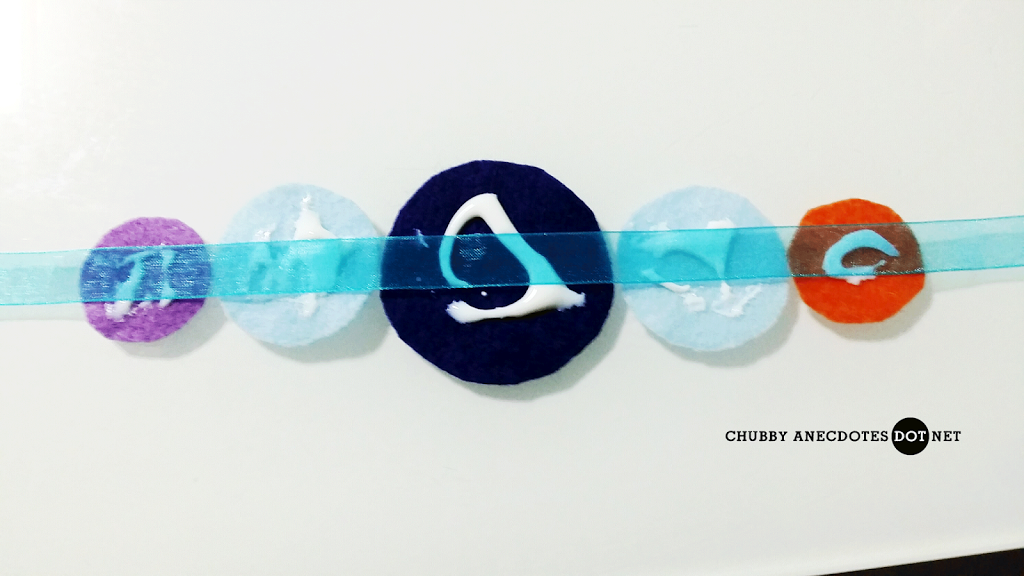
Step 2: Apply glue and stick a length of ribbon across the sequence.
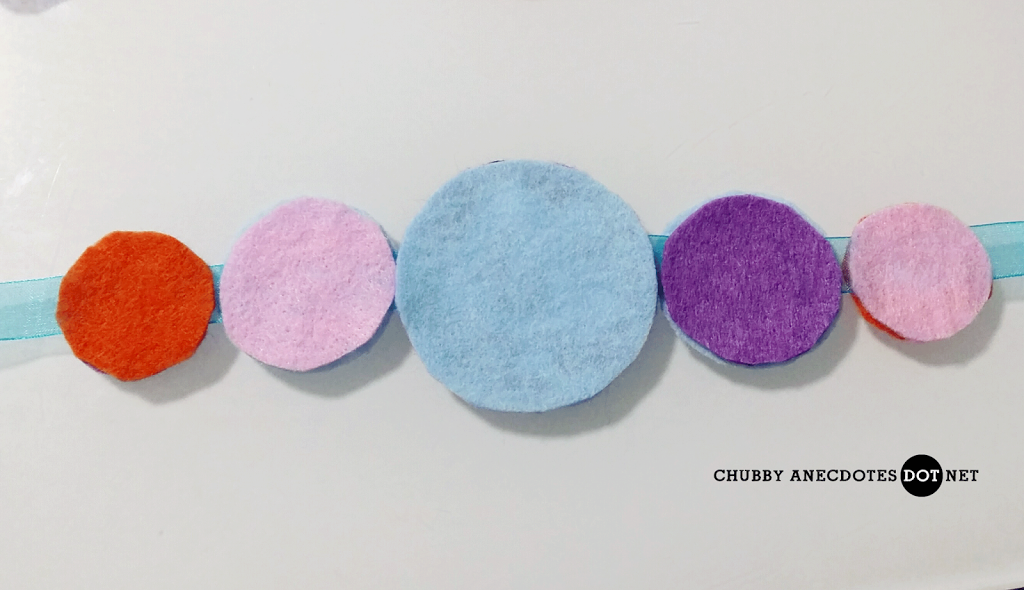
Step 3: Apply more glue on top of the ribbon and stick another layer of felt circles on top.
Step 4: Stick 2 small felt circles onto the 2 medium circles.
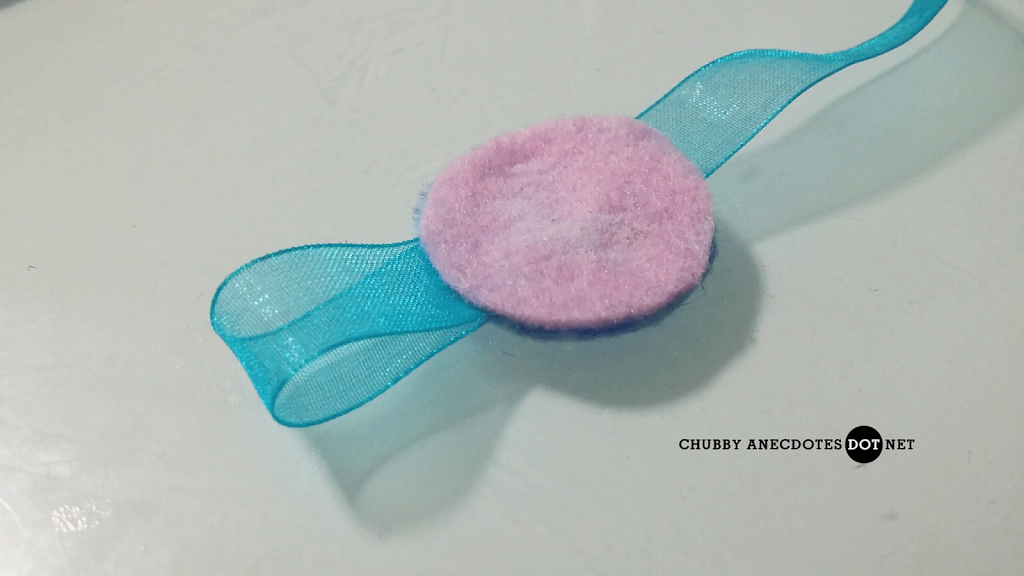
Step 5: If you are making a necklace, here’s how to fix the hook:
First you fold down a length of ribbon and sandwich it between 2 small felt circles with glue.
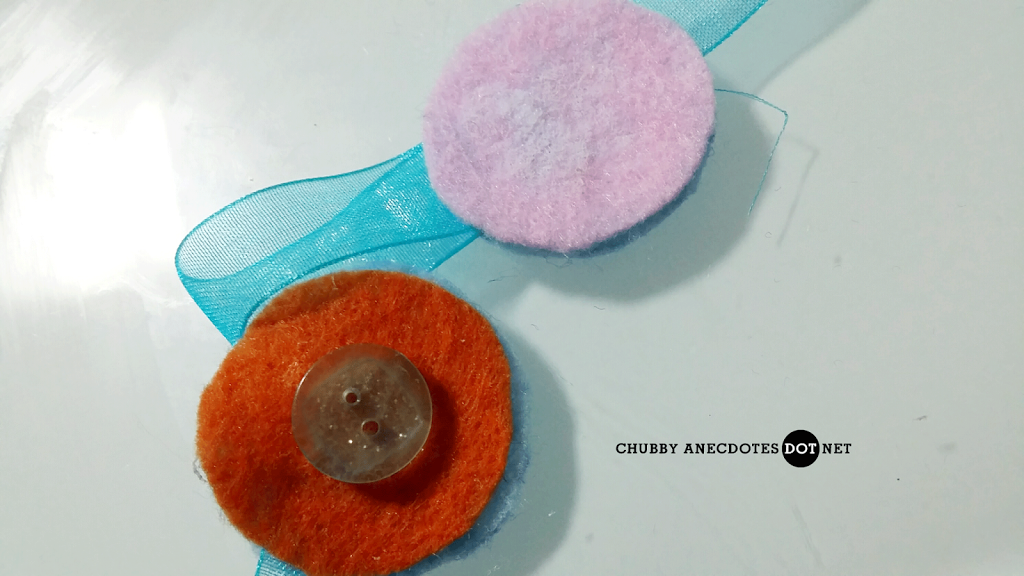
Sandwich the other end of the ribbon with 2 felt circles and glue too.
To fasten the necklace, simply loop this end into the other.
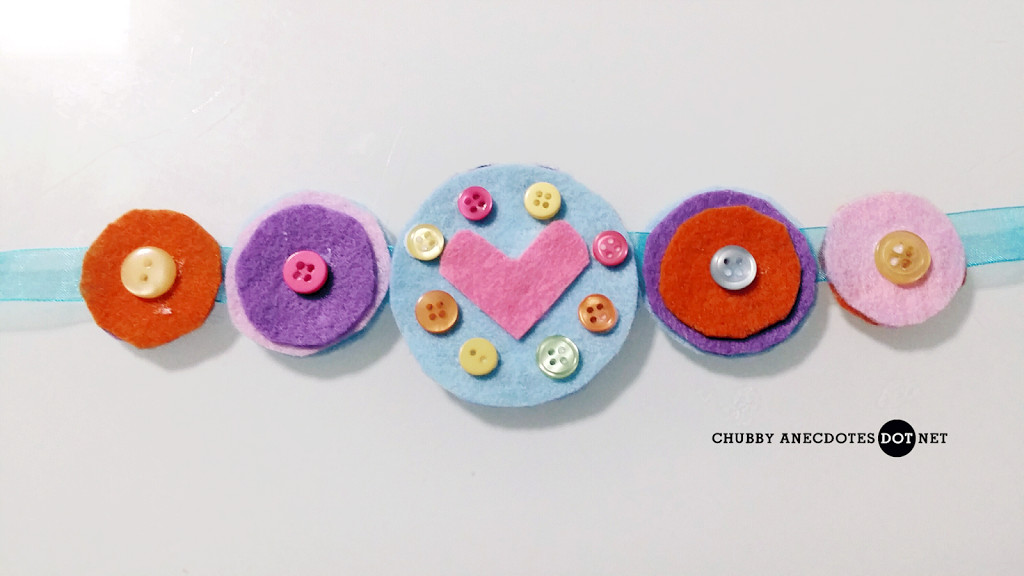
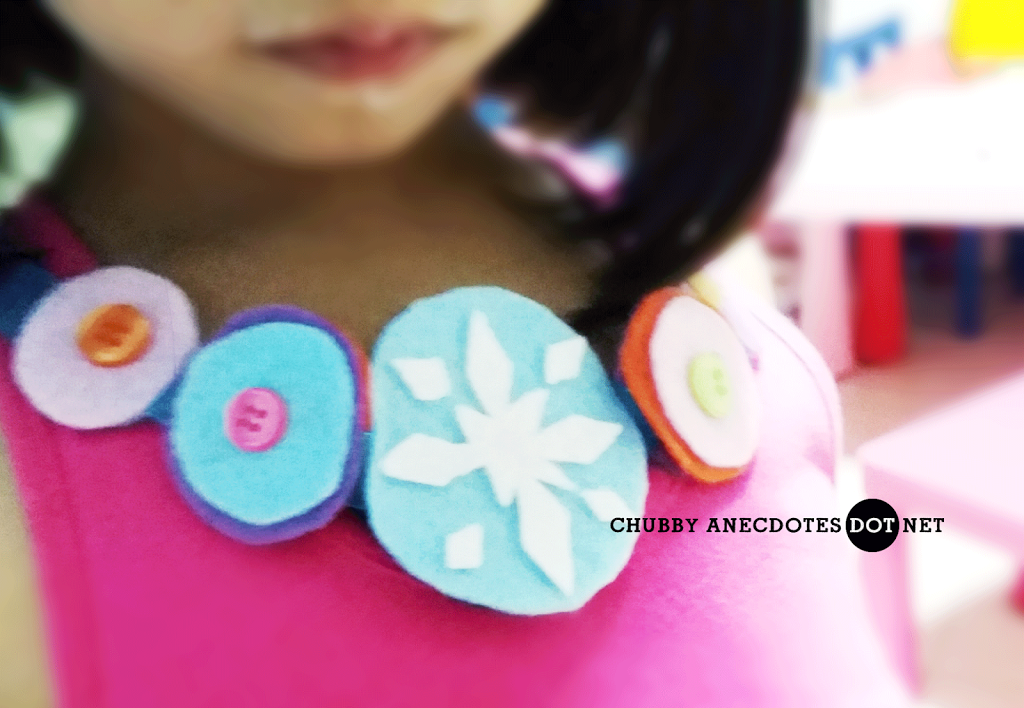
Step 6: This is my favourite step. It’s time to decorate!
Give it some time for the glue to dry and tadahh!
Here you are, your child’s very on felt necklace.
She can wear it around her waist too! It will make a pretty cool belt, don’t ya think?
Linking up with: